Dual Boot Ubuntu and Windows

A lot of us want to do a dual booting of 2 operating systems. Here is the guide on how to dual boot Ubuntu and Windows. Novice users of Ubuntu might resort to the wubi.exe path that makes the dual boot Ubuntu and Windows so much easier to pull off since Ubuntu is installed as another program inside of Windows itself and not a whole real separate operating system. But the actual installing of Ubuntu as the real thing and trying to dual boot might seem to be a difficult task to the average user since there are swap files to allocate and various partitions to create. In this guide I will show you how to dual boot Ubuntu and Windows the easy way out.
Dual Boot Ubuntu and Windows
Assuming you have a Windows operating system installed on your computer to begin with, since this situation is more common on a laptop purchased off the shelf. Download Ubuntu and burn it to a blank CD following the instructions on the site. Set your computer to boot off from CD and allow the Ubuntu Live CD to boot up.
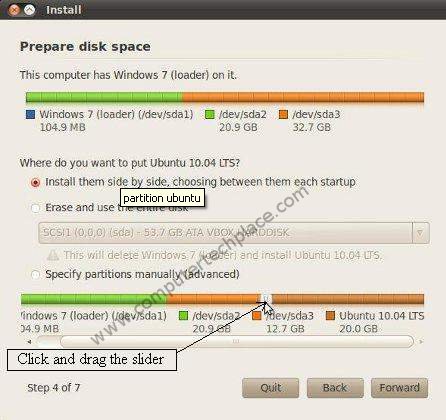
The options in Ubuntu should be straight forward and easy to follow, it is easy until you get to the partitioning stage. It may look tricky to most users and a lot of us will just click next any way it will sort out the rest of the stuff. The only thing is that you have no contol over the size you want for your Windows and Ubuntu. But there is a way to have control over your partitions without a lot of hard work.
Unknown to many people, the Ubuntu partitioning interface has a movable slider which allows the user to drag and resize the Ubuntu drive without much hassle. You can slide that slider until you are happy with the final size and click “Forward” and you are done with the most difficult part in installing of Ubuntu.
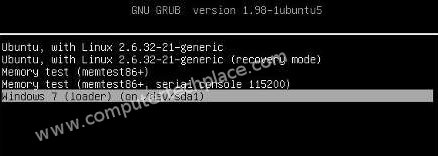
Once you are done with the installation of Ubuntu, you will get a new boot loader automatically on the next reboot showing additional choices and selections. You now have a dual boot Ubuntu and Windows 7


Leave a comment