App Store – Device Could Not Be Recognized Fix For Laptops Without Ethernet Port

If you have built a custom Mac, you will soon realize that there will be issues such as Device Could Not Be Recognized when you are trying to sign into the App Store. There are quite a few services that will require this fix, namely iCloud, iTunes and App Store. This guide is more relevant to users who do not have a built-in Ethernet port, thus, it is impossible for you to apply the fix that is very common throughout the online community and that is to simply go to the network settings and remove all the network interfaces that are already there and do a restart. After which ensure that you are connected to the Internet via the Ethernet port to begin with and everything should sort itself out.
App Store – Device Could Not Be Recognized Fix For Laptops Without Ethernet Port
Unfortunately, I am using a notebook that does not have a built-in Ethernet port. I only have the option of USB to LAN adapters. Therefore, my approach will be different. Since I so not have a built-in Ethernet port. I will need to use a fake Ethernet Kext file.
Method 1 – Drag and drop of the Kext file into the Kext Utiity
Step 1 – Install the NullEthernet Kext.
This Kext file will create an entry in the network configuration so that the laptop will look like it has an Ethernet interface. Download the Kext Utility and the Null Ethernet Kext file. Simply Drag the Null Ethernet Kext file to the Kext Utility, you will see some text moving across the Kext Utility and wait for it to be done. You will also need to drag the ssdt-rmne.aml over to your EFI=> Clover => ACPI => Patched. Rename it to SSDT.aml or SSDT-1.aml accordingly if you already have some SSDTs in place.
STEP 2 – Remove all the network interfaces
This step should be easy, assuming the fact that if you are capable of doing a Hackintosh, this should be a piece of cake.
Step 3 – Remove the System Configuration folder
Navigate to Library => Preferences => System Configuration
Trash the entire System Configuration folder
Restart the Mac and you should see all your interfaces re-added automatically.
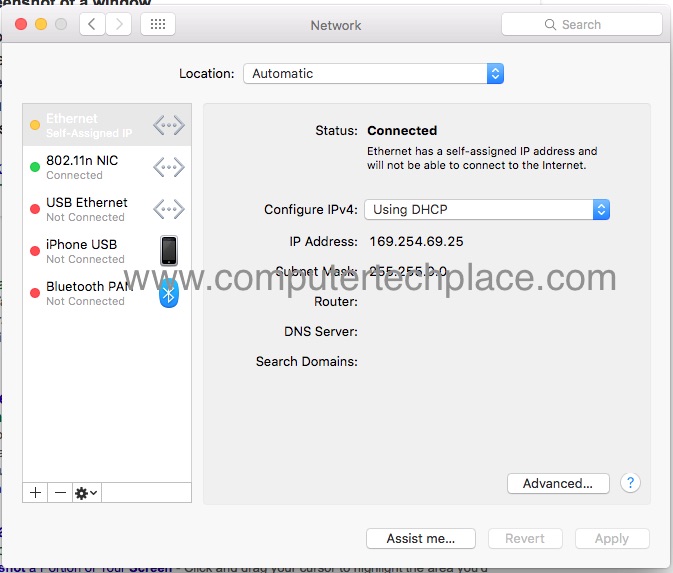
As long as the Null Ethernet interface is listed as the first connection, no matter which network connection is currently being used. You are on the right track. Try signing into your iCloud, Appstore and iTunes, and they will work just fine.
Method 2 – The use of MaciASL to do DSDT patching ( Required for newer Macs like Sierra)
You might run into a situation where the magic does not seem to work for the drag and drop method with the Kext Utility. That’s where this method comes into the picture.
For newer Hackintosh Macs you will need to copy the Null Ethernet Kext file into the EFI folder. ( At this point if you are lost as to what EFI folder I am talking about, it is very unlikely if you are able to complete the installation of a Hackintosh, you should have come across the need to copy the Kexts files into the EFI folders using Clover.) Thus I will not explain in detail.
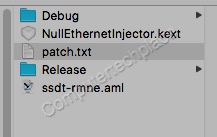
After which, you will find that the Null Ethernet zip file provided by Rehabman hosted at github, comes with a text file. This patch file is to be used in the MaciASL program to patch a DSDT file that you will insert into the EFI = DSDT folders.
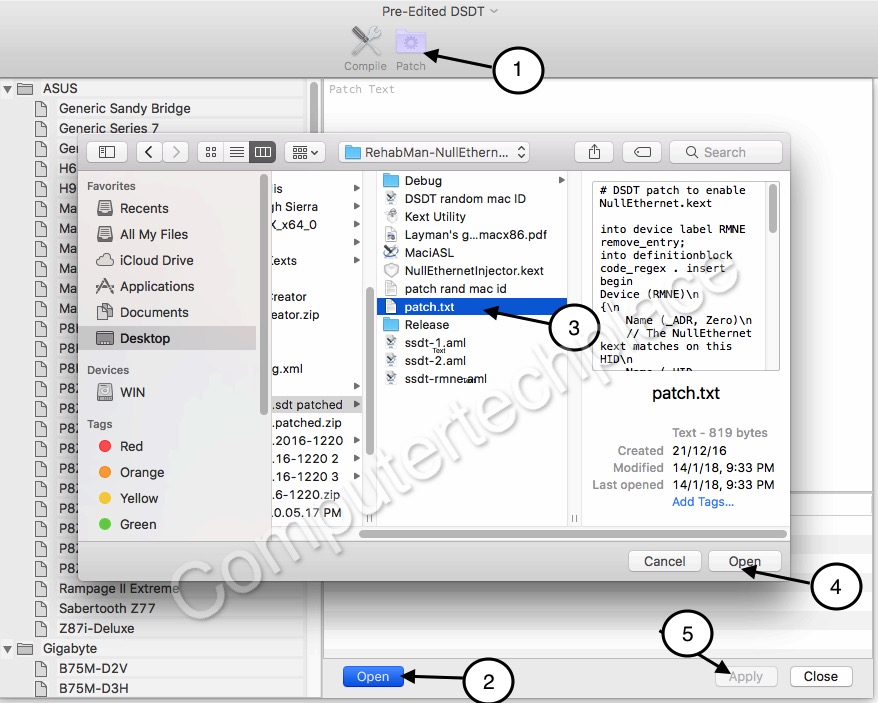
Start up the MaciASL program and proceed to patch as per image. Once done, save the DSDT into a file using the menu options at the top.
Use Clover to insert the DSDT file that you have saved or rather I should say “Patched” and restart your Mac, and the Null Ethernet adapter should show up.
The only function that will require some advance workaround and fix will be the iMessage which I have decided to let it be for the time being. Who uses iMessage when you have Whatsapp for Mac now.
Attached Files
Leave a comment