Reflashing a broken iPhone 5s that cannot be turned on
 A few weeks back, my younger sister sought my help to reflash her iPhone. It was in a state of coma. I have never seen an iPhone that could not be turned on at all. All it had was a blank screen. She did not do anything such as jailbreakjng, or resort to unauthorized firmwares. Nevertheless, she was talented at bricking phones. I had revived her Samsung s4 2 times. But reflashing an iPhone is one one. Reflashing a dead iPhone? But how do I determine that the phone is still alive? I had to resort to 2 ways. I need to thank my colleague Ian Teng who helped to restore this phone after working on it for an entire day.
1. A charger with LED wire. – This will allow you to conclude if the current is still charging the phone as the device cause the LED to change its color if it is charging.
2. The Tinyumbrella software. – This software will detect an iPhone if its alive. The moment you connect the iPhone, even if it is not responding, this software will be able to load the details of the phone.
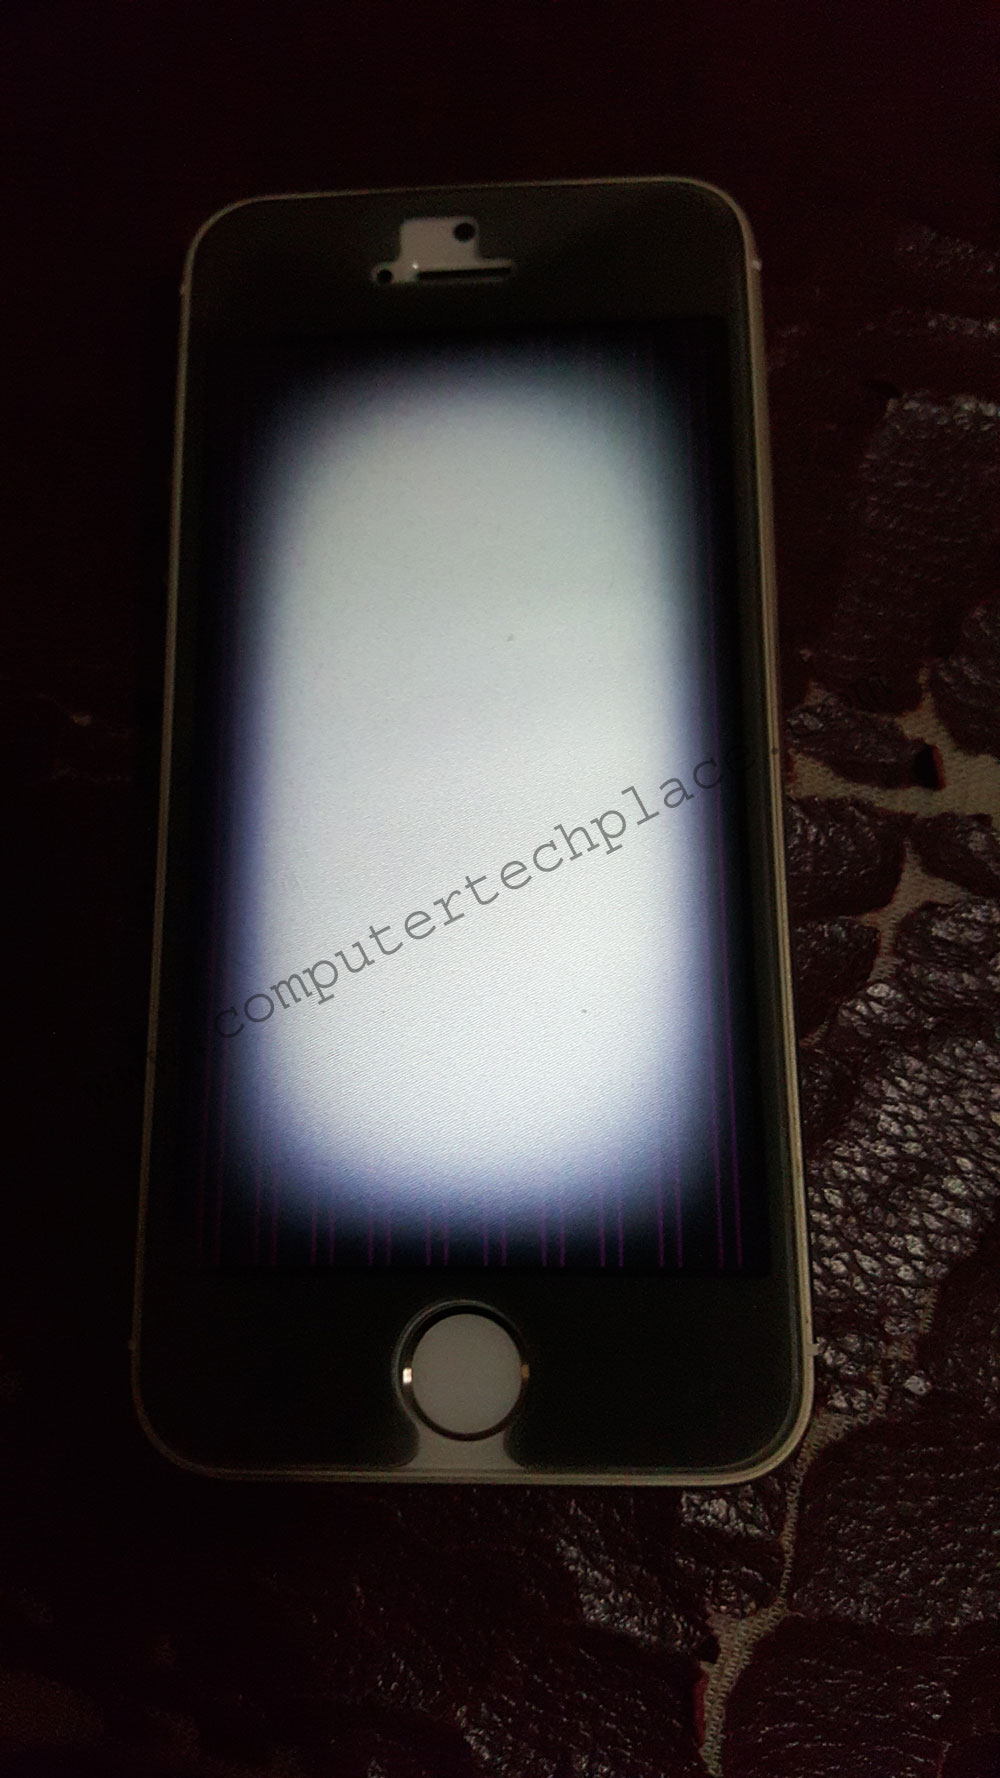
3. Itunes. – The latest iTunes will be capable of detecting if an iPhone is connected even if it is not able to be turned on, with no image shown on the display. As you can see for yourself, how bad the situation can be. No serial number, no other information as to how much memory is on this iPhone.
Reflashing a broken iPhone 5s that cannot be turned on
Working on flashing a bricked iPhone back to working condition.
You will need a few things.
1. Fresh installation of Windows OS. – Please consider installing a vhd Windows and create a multi-boot system. I will be creating a guide on how to do a virtual disk Windows so that you can instantly swap and refresh the OS via a simple copy and paste to do the re-flashing with minimum effort soon. The guide on how to VHD is here.
The reason for a need for a fresh installation of Windows is due to point 2.
2. The latest iTunes
Installing the latest iTunes on your computer is obvious and there is no need to explain why. I would suggest that the user run through the entire system to uninstall and remove entire folders of the iTunes before installing the latest version. This is to ensure that the iTunes does not have any pre-records of the phone’s condition or rather have a record that there is a failed flashing record.
3. Amending the hosts file to remove any outdated dns record of firmware server that is provided by Apple.
This is necessary in case you have installed anything that might have modified the dns record to point Apple’s server to another location, for instance, Tinyumbrella. I will not post the entire detail on how to modify the hosts file, if you can end up reading a guide on how to recover a broken iPhone, I presume that you have more exposure to advance Windows configuration. The guide on how to do it is here.
4. USB 2.0 port
Even if you have a USB 3.0 port, I will insist that you use a USB 2.0 port to perform the flashing. If you look through tons of Apple iPhone flashing guide, you would have seen people saying, if you failed to flash your iPhone, try another USB port. Now, the secret is not just a USB port. It is to do it through a USB 2.0 port. The flashing of the iPhone was not stable or was not really a success, not until we used an USB 2.0 port. If you are wondering why, my hunch is that it is difficult for a USB 3.0 port to sustain enough power and transfer data at such fast rates via a long cable. This is not just an issue with iPhone. I cannot even copy a large file across to a Samsung s6 Edge+ via my USB 3.0 port. So it is not just an issue with iPhone.
5. Original iPhone cable.
Or alternatively, a really good costly cable from a respectable brand. Please do not use those multi-split charging cables for flashing purposes. For obvious reasons. You need a stable connection.
6. Charge the phone for a few hours.
Charge it even if the phone is totally knocked out cold. Because you will need the battery life later on, before you start the firmware upgrade.
Reflashing a broken iPhone 5s
Start the flashing of a broken iPhone
1. This is what happened on the ground. That is why I strongly advise that you use a fresh Windows to perform every single flash or re-flashing. Please consider opting for the vhd option, or else, the other option is to switch to several computers or re-format your PC. should your flashing fail. 🙂 I don’t think that is what you want.
2. Install a fresh version of the latest iTunes in a fresh Windows operating system.
3. Connect the iPhone to the computer and press the power button and the home button together. Till you hear the sounds created by the computer that an iphone has been detected etc. Please do note that there is a huge difference in recovery mode and DFU mode. Just because the iTunes say that the iPhone is in recovery mode does not mean it is. A real recovery mode means that the screen is black. You should not see any image or the connect to iTunes on your iPhone. This is not the real recovery mode and it is not gonna work. Getting the iPhone into a DFU mode is what you need to do.
Basically, this is how you can get it into DFU mode.
- Off the iPhone first. Unless if your phone is already in a dead coma, then there is no need for this step.
- Press the Power Button for 3 secs
- Press and hold the home and power button together for 10 secs
- Release the power button but keep the home button pressed for 15 seconds.
- The phone will be in DFU mode.
I know this looks damm silly, but please count the seconds religiously.
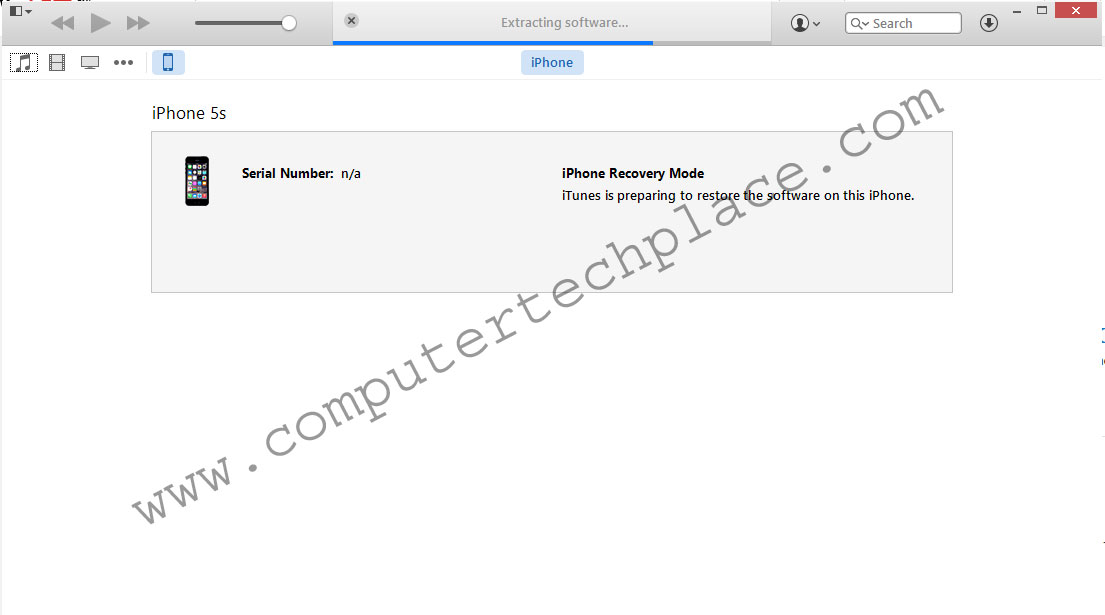
By now, the iTunes should have popped up a message saying that an iPhone has been detected in DFU mode. Click on the recovery button and it will check online for the latest firmware. Let it download. I know most users love to pre-download the firmware and hold shift click to choose your firmware. For some reason, iTunes will fail if you use the pre-download concept.
4. Once the firmware is downloaded, the system will proceed to flash the firmware. It took very long, and you wonder what the heck is going on. But just let it do what it needs to do. After which, your iPhone should proceed to flash.
5. If it fails. You will have to get into a fresh Windows operating system and reflash once more, by allowing the iTunes to detect and re-download the firmware once more. This is not a joke. We re-flashed at least 3 times using different computers and a fresh installation of iTunes. With each attempt, the phone went from a total coma, to at least and Apple icon on screen, to having a serial number and finally the type of iPhone being detected in iTunes and eventually a revived iPhone. You won’t believe how bad the iPhone was broken.
Eventually, the iPhone was revived. Neverthless, the iPhone itself was due to be trashed in the junk yard. The battery life was horrendously inaccurate and even during the rebooting stage, there was blue screen of death and deathly white light when it hanged. Talk about Halloween, this phone is best suited for the occasion.
If you looked at most of the iTunes recovery guides, especially those who claimed that Tinyumbrella still works, they are at least 3 years outdated. iTunes would have blocked off such instances of possibilities of allowing the phone to be down flashed. I hope this guide is useful for those who have accidentally bricked their iPhone.
Leave a comment