Ubuntu Manual Partitioning Guide
Welcome to the CompterTechPlace Ubuntu partitioning guide. This article will show you how you can do a manual partitioning of a drive to facilitate the installation of the Ubuntu operating system. Some users of Ubuntu will take the easier approach which is less complicated by allowing Ubuntu to partition the whole drive on its own. Even if you are installing Ubuntu along side with another operating system, you can still drag the slider during the partitioning phase to assign the amount of space to be used for the 2 operating systems based on your preference.
But still, a manual approach allows a total control on how much space to be used for virtual memory and the user’s home directory. By default, Ubuntu sets quite a sum of space for memory swap which is not really nessassary since we have so much rams these days. For someone who is new to the Ubuntu world, you may not know how to do a manual partiitioning. Here’s how to do it.
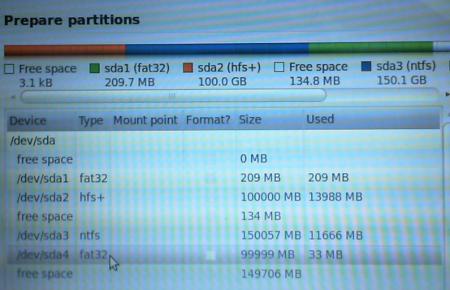
Assuming that you already have some other operating systems in your computer. You will get to a point when you are installing Ubuntu asking you how you intend to partition your system, automatic or manual. Choose the manual partitioning mode. Select the space that you wish to use for the Ubuntu installation.

Click “Delete”. Now the partition meant for Ubuntu should read “free space”.
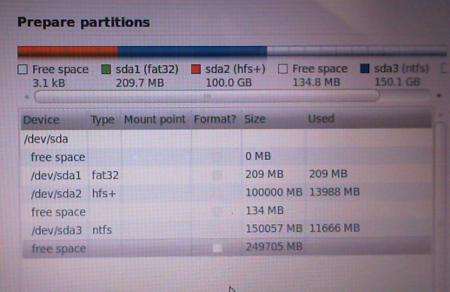
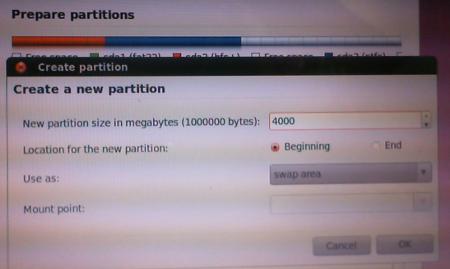
Click on the “free space” and select “Add” and select “Swap”. The first partition that you need to allocate is the virtual memory called “Swap”. The value to key in is around twice the amount of rams you have in your computer because in the past computers do not have a lot of rams. But now, you can key in just 2000 which is 2 Gig worth of virtual memory followed by “OK” . That is more then enough.
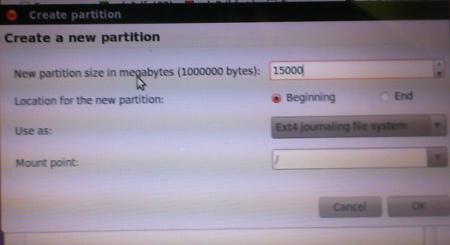
Click on the “free space” again and “Add”. The second partition that you will need to set is the amount of space you want to use for your Ubuntu installation. In other words, this partition is the amount of space you wish to set for all the programs that you need to download and install. For this partition, you can set the value to 30000 which is 30 gig. Select “/” for the Mount point.
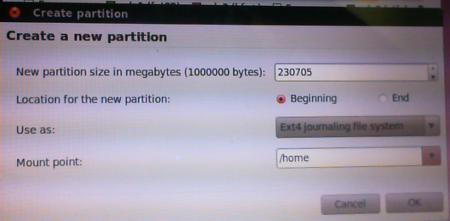
The 3rd partition which is also the last partition that you need to set is the “home” partition which is like the “documents and settings\user” folder which you will need to allocate to store your files. This partition can be as large as you want. You can simply key in whatever value is left in the hard disk or partition that is allocated for Ubuntu and click “OK”.
You can now click “forward” to finish up the installation. I hope this Ubuntu manual partitioning guide is easy for users to understand.

Leave a comment