Share files Between Ubuntu 10.04 And Windows as Host Via Virtualbox Shared Folders

Share files Between Ubuntu 10.04 And Windows as Host Via Virtualbox Shared Folders
 This article shows you how to Share files Between Ubuntu 10.04 And Windows as Host Via Virtualbox Shared Folders
Ubuntu 10.04 with Windows as the host Operating system, you will need to set the configuration for the Virtualbox Shared Folders in the Ubuntu running from Virtualbox. There are quite a few procedures but it is not too complicated. A lot of images and screen-shots are attached for easy reference.
First off you will need to know that it is not possible to Share files Between Ubuntu 10.04 And Windows as Host Via Virtualbox Shared Folders
The Windows must be a real OS and the Ubuntu will be the Virtualbox OS.
Share files Between Ubuntu 10.04 And Windows as Host Via Virtualbox Shared Folders
Step 1
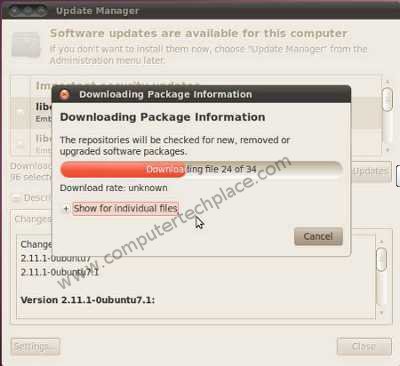
First you will need to update your repositories of your Ubuntu 10.04 operating system, this ensures that you have the latest files and is able to proceed with any installation of any package.
Execute these commands in the terminal to install additional packages.
sudo apt-get update
sudo apt-get dselect-upgrade
sudo apt-get install gcc gcc+ linux-kernel-headers
Do a reboot of your Ubuntu operating system and allow the changes to take effect.
Now you may execute this command to get rid of any installation files
sudo apt-get autoremove
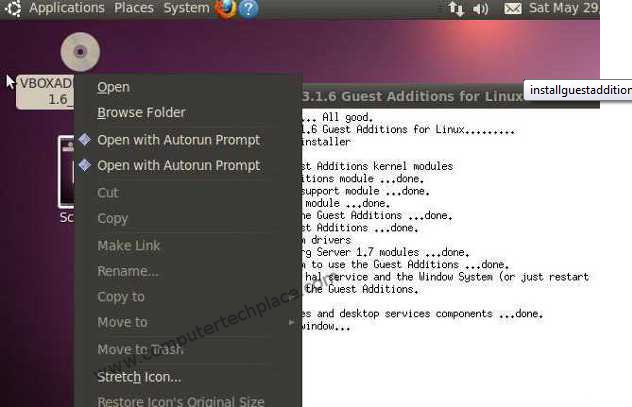
Now you will click on the menu “Devices” in the Virtualbox program and click the “Install Guest Additions” or press the right CTRL + D. You should see the VBOXADDITIONS_3.16_XXXX by clicking on the Ubuntu menu “places”. At this point in time, you will see a CD icon on the Ubuntu Desktop bearing the name “VBOXADDITIONS_3.16_XXXX”.
Right Click on that disc and select “Open with Autorun Prompt” and it will ask you for the password before proceeding to install anything. Allow the installation to complete. You must do this again even if you have already installed the Guest Additions before. Every time you upgrade a software package, there is a possibility that the Guest Additions will need to install extra files.
After installing the Virtualbox Guest additions, you will need to reboot to allow the system to refresh itself so that the new files will be in use. Installing of the Guest additions is similar to installing of drivers on a computer, a reboot is needed or else you won’t see the changes being applied.
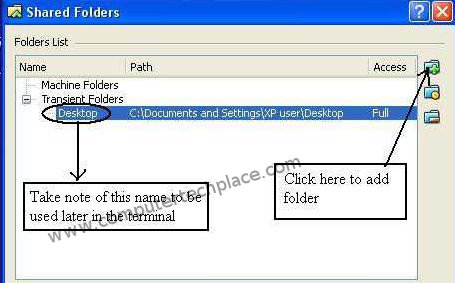
Now run the Virtualbox program and click on the “Devices” option of the Virtualbox program and then select “Shared Folders” Click on the “+ folder” image at the right side to add a folder you want to share. Click the drop down menu and select “others”. Select one folder, say “Desktop” for example.

Now you will need to create a folder in Ubuntu to share files between the host operating system and the virtual Ubuntu.
Use the Terminal and type in the following commands.
sudo mkdir /mnt/name of the shared folder
Example: sudo mkdir /mnt/sharing
sudo mount vboxsf –w [name of the folder selected from the host OS] /mnt/[name of folder you created in the virtual Ubuntu]
Example: sudo mount.vboxsf -w desktop /mnt/sharing
The files from the host operating system and guest Ubuntu should be now available if you go to that folder. Click on “reload”, if you do not see anything yet.
But the shared folders will be missing on the next boot up, so here are the steps on how to set it to mount automatically.
Navigate to the etc folder.
Using the Terminal,
Key in the commands
cd.. [x2]
cd etc
sudo gedit rc.local
#
# This script is executed at the end of each multiuser runlevel.
# Make sure that the script will “exit 0″ on success or any other
# value on error.
#
# In order to enable or disable this script just change the execution
# bits.
#
# By default this script does nothing.
# auto mount VirtualBox shared folders
mount.vboxsf -w desktop /mnt/ubuntu
# end of VirtualBox shared folders
#
exit 0
# rc.local#
#!/bin/sh -e
Insert the commands into the text and save it. From now on the shared folders will be automatically mounted. Do note that you will need to remember to add the shared folder from the virtualbox software. If you do not add that when you start Virtualbox or for some reason the shared folder that you have selected in the host operating system is not there anymore, you will need to re-select it first. Reboot Ubuntu, and the shared folder will be mounted again. I hope this Share files Between Ubuntu 10.04 And Windows as Host Via Virtualbox Shared Folders is easy to follow and understand.


Leave a comment