Hackintosh Yosemite Asus 303LNB Laptop – Creating installer thumb drive
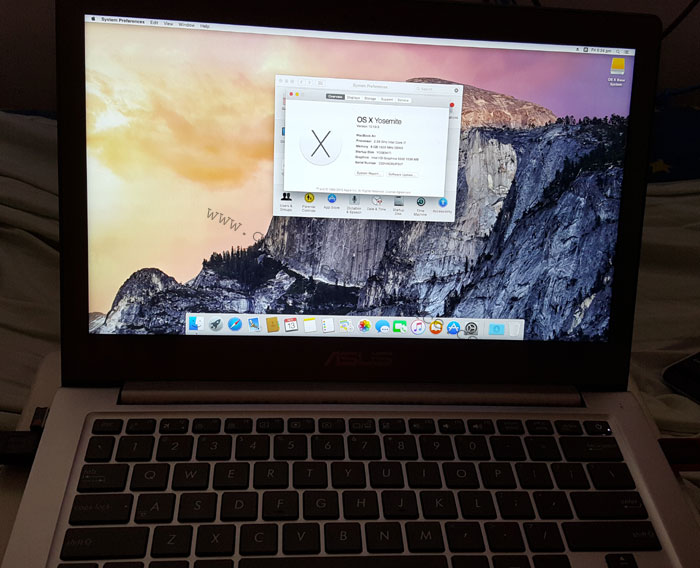 I started venturing back into Hackintosh and I succeeded in a Hackintosh Yosemite on an Asus 303LNB laptop. It’s been quite a while I touched Mac, and before I even realized, it’s been around 6 years since I started stepping into the Mac arena. Back then Snow Leopard was a leap into the future where Apple decided to release Mac computers with Intel chips and Nvidia graphics. I did the guide back then on how to install Mac OS in a Compaq laptop. Not too long after Snow Leopard, there was the Lion which I tried as well. But soon after, the novelty died out and there don’t seem to be much of a difference with regards to the other Mac OS. I stopped going after Macs release soon after. It is not cheap paying for an operating system that only resides in the Apple store, and it is up to Apple to decide if they want to pull the plug and withdraw the entire software off the shelves, even though you have paid for it.
But Yosemite re-ignites my flame of interest to check out Mac OS again. It is free, as long as you have Snow Leopard or Lion, etc. That is kinda interesting. Thus, I decided to check out Mac OS and see if it would work in my Asus 303 LNB laptop.
As the path to glory is long and painful. I will have to split it up into a few parts. Most of my guides are catered towards users who wish to achieve the same result without having to spend a lot of money. To begin creating an installer thumb drive. You will need to have a Mac computer to begin with. For those who only have Windows PC. Please refer to this guide on how to install a Snow Leopard first in the Windows PC.
Hackintosh Yosemite Asus 303LNB Laptop – Creating installer thumb drive
STEP 1 – Pre-requisites.
1. A couple of thumb drives – One for the main installer and another for the post-installation files.
2. USB Keyboard and Mouse – In my case, the laptop keyboard and touchpad will not work in the initial install.
3. The USB to LAN connector – In my case, I am using a AX88772C device. Because the Wi-Fi will never work, Mac officially does not support Intel Wi-Fi chip.
4. Yosemite dmg file which you will have to download online.
STEP 2 – Creating the Yosemite thumb drive in Virtual Box Snow Leopard
If you are lucky enough to have a Mac, use the Mac. The steps are the same.
Connect the thumb drive to your PC and using the concept that is explained in the previous guide on how to install Snow Leopard in VirtualBox. Let the thumb drive show up in the Mac OS first. Copy the Yosemite.dmg over to the Virtualbox as well.
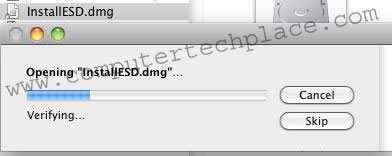
Double click on the Yosemite installESD.dmg to mount the Yosemite CD.
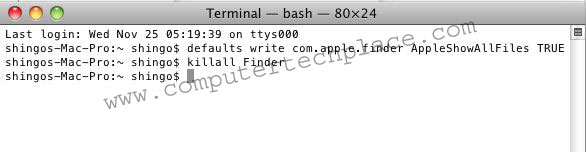
Go to Applications => Utilities => Terminal
Run the following command to unhide all files.
defaults write com.apple.finder AppleShowAllFiles FALSE
killall Finder
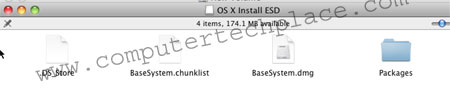
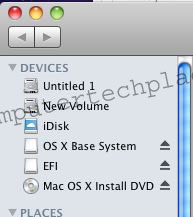
You will find some greyed out files appearing out of the Yosemite.ESD
Go to applications => Utilities => Disk Utility
Format your USB drive first.
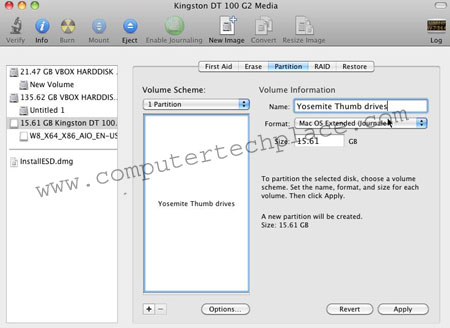
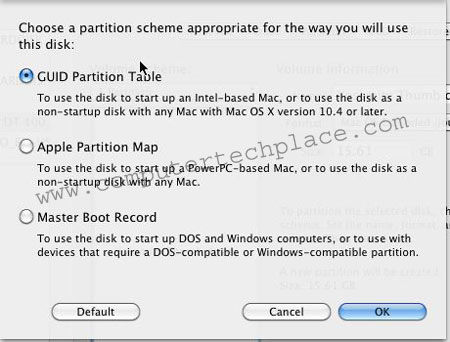
Remember to click on options and choose GUID partition table
Click on apply to format the thumb drive.
Restore the Yosemite Basesystem.dmg to the thumb drive.
Drag and drop the sources to the areas.
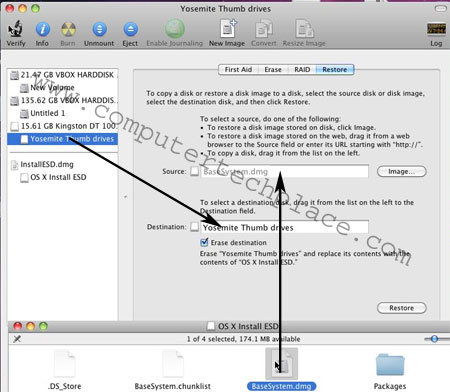
Click restore and it will copy the base Yosemite files over to the thumb drive.
Once the restore is complete, you will need to copy the packages folder from the Yosemite.ESD across to the thumb drive\system\installation folder
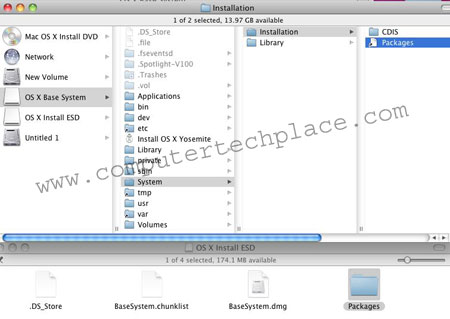
Replace the package link in the thumb drive and it will take a while to copy, depending on how fast your thumb drive is.
Copy the BaseSystem.chunklist and BaseSystem.dmg over to the root of the thumb drive as well
Install Clover onto the thumb drive.
Download Clover for Yosemite from TonyMac
Run the Clover package and we will have to install it onto the thumb drive that you are preparing for the Asus 303LN. If you are not using any EFI based computers, your thumb drive is now completed and ready for use. But for the Asus 303LN, you will need to install this Clover EFI bootloader.
Run through some of the pre-explanatory notes of the Clover interface until you get to a page where you can Change Install Location with a Customize button.
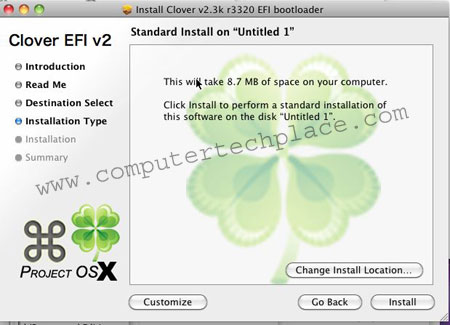
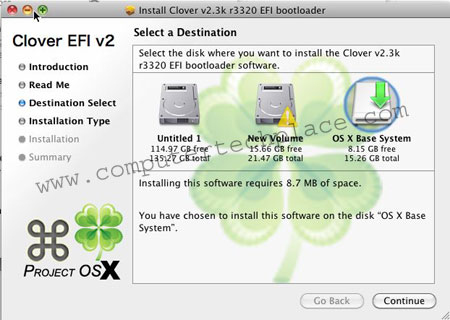
Click on Change Install Location and choose the thumb drive.
After which, click on Customize and you will need to select some of the options here. You do not have to touch some options that are ticked by default.
Under the Drivers64UEFI category, select as follows
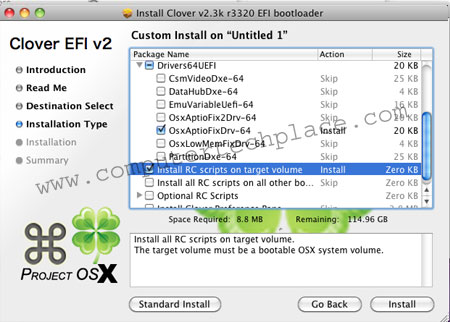
Once you have selected what you need below go all the way to the top and select install for UEFI booting only.
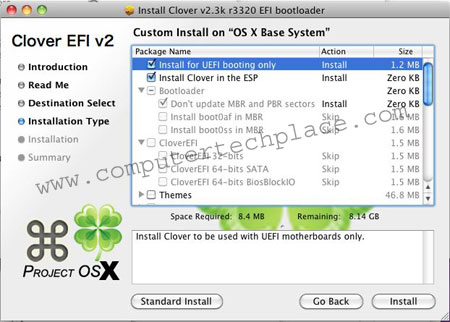
Once done, click install.
Additional modifications and finalizing.
Now that you have installed the Clover, you will notice an extra EFI drive show up. Note that if you unplug or detach the drive now, the files that you intend to copy over may not work anymore.
We will need to replace the plist file. I also recommend copying a few additional items across as well, so that you can follow up with the installation directly later.
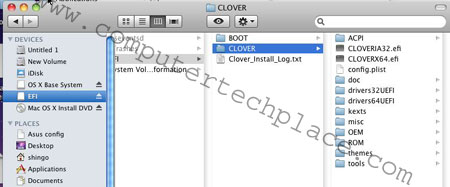
Navigate to EFI=> EFI=> Clover=>
Replace the plist there with the Asus plist Remember to rename it to just config plist
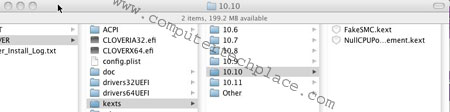
Navigate to EFI => EFI => CLOVER => kexts=>10.10=> and add FakeSMC.kext
Navigate to EFI =>CLOVER =>kexts =>10.10 => and add NullCPUPowerManagement.kext
If your laptop is exactly or pretty simiar to mine, please use Rehabman Power Kext instead
It is extremely stable as compared to the NullCPUPowerManagement Kext
Please also add the AX88772C.kext standalone kext file. This will enable the ethernet during bootup.
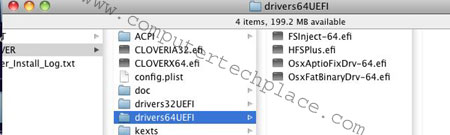
Navigate to => EFI =>CLOVER => drivers64UEFI => remove VBoxHfs-64.efi and add HFSPlus.efi
Finally, copy over the Ethernet driver and Multi-beast or any Mac installer files you need to use later over to the thumb drive. Create any folder in the base osx installer. Do not copy to the EFI area.
Step 3 – Installing the Mac OS Yosemite over to the Asus Laptop
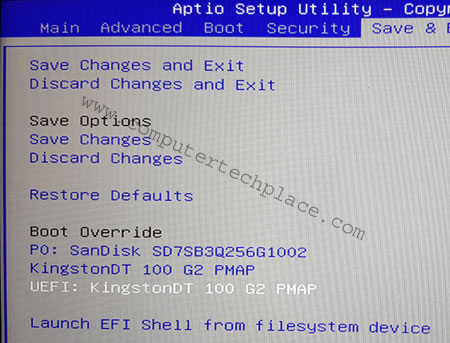
Set as follows in the BIOS
In the Advanced Tab
Intel Virtualization Techonogy = Disabled
Intel AES-NI = Disabled
VT-D = Disabled
Graphics Configuration => DVMT Pre-Allocated = 64 Meg.
Boot up the thumb drive and choose UEFI thumb drive option.
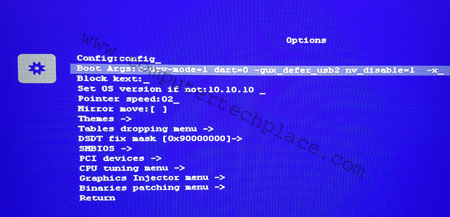
You will see some options. Go to the options setting. insert the -x in the boot flags if you are unable to boot up properly. If your laptop is exactly the same as mine, I have edited the plist so that you should not need the boot flags. Simply press enter to install.

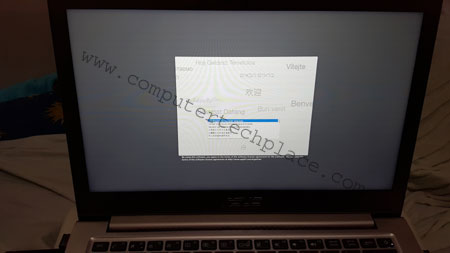
Once done, go back to the main screen and press enter to load the Mac Base installer.
Now you can sit back till the Mac installer page shows up and you can proceed to follow the guide on how to install Snow Leopard to partition your Windows PC and install the Yosemite. It is the pretty much the same.
Connect USB keyboard and mouse first. There will be kexts to install later once the OS is installed, only then your laptops touchpad and keyboard will be functional.
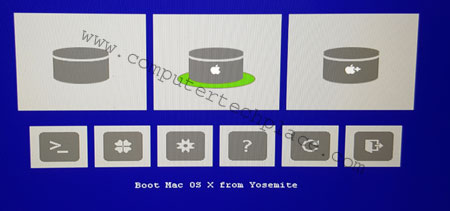
Once the installation is complete, the laptop will reboot and you will have to use the same thumb drive to boot up the system. This time round, you will notice that there will be an additional boot entry.
Step 4 – Kexts installation and finalization.
You will need to use step 3 to insert the -x first (if you are lucky, there is no need to), till your system is fully configured. Let’s begin by installing the multi-beast. Choose the PS /2 Keyboard / Mice and Touchpad to install the kexts for your physical laptop keyboard and touchpad.
Ensure that you have connected the laptop to the USB to Ethernet connector with an active connection. If you do not do so, you can still force through the entire installation. However, there will be complications when you try to sign in to the Apple Store.
Install the AX88772C driver installer for the USB to LAN adapter and you will be able to use the ethernet on the fly even if you unplug the LAN later.
Install the Voodoo HDA-V2.8.8 for the sound, its very soft, so you might want to go to the controls to jack up all the volume to the max. There’s actually 2 devices to increase the volume which looks like the left and right side to me.
As for now, I am still working on finding the other drivers such as getting the Intel HD graphics to work. I will be updating this guide as and when I figure out more kexts and support for this laptop. It looks like HD5500 graphics is way too new and it may not have full support yet in near future. However, keep your hopes high and let me know if you find any guides on how to achieve full functionality for the graphics card. I am still trying to figure out how to force a HD resolution. I know 1028 x 768 looks real shitty. I have updated this guide and the plist. Now the laptop is able to display in its full glory. Please refer to the kext guide for a complete tune up and tweaking of this laptop.
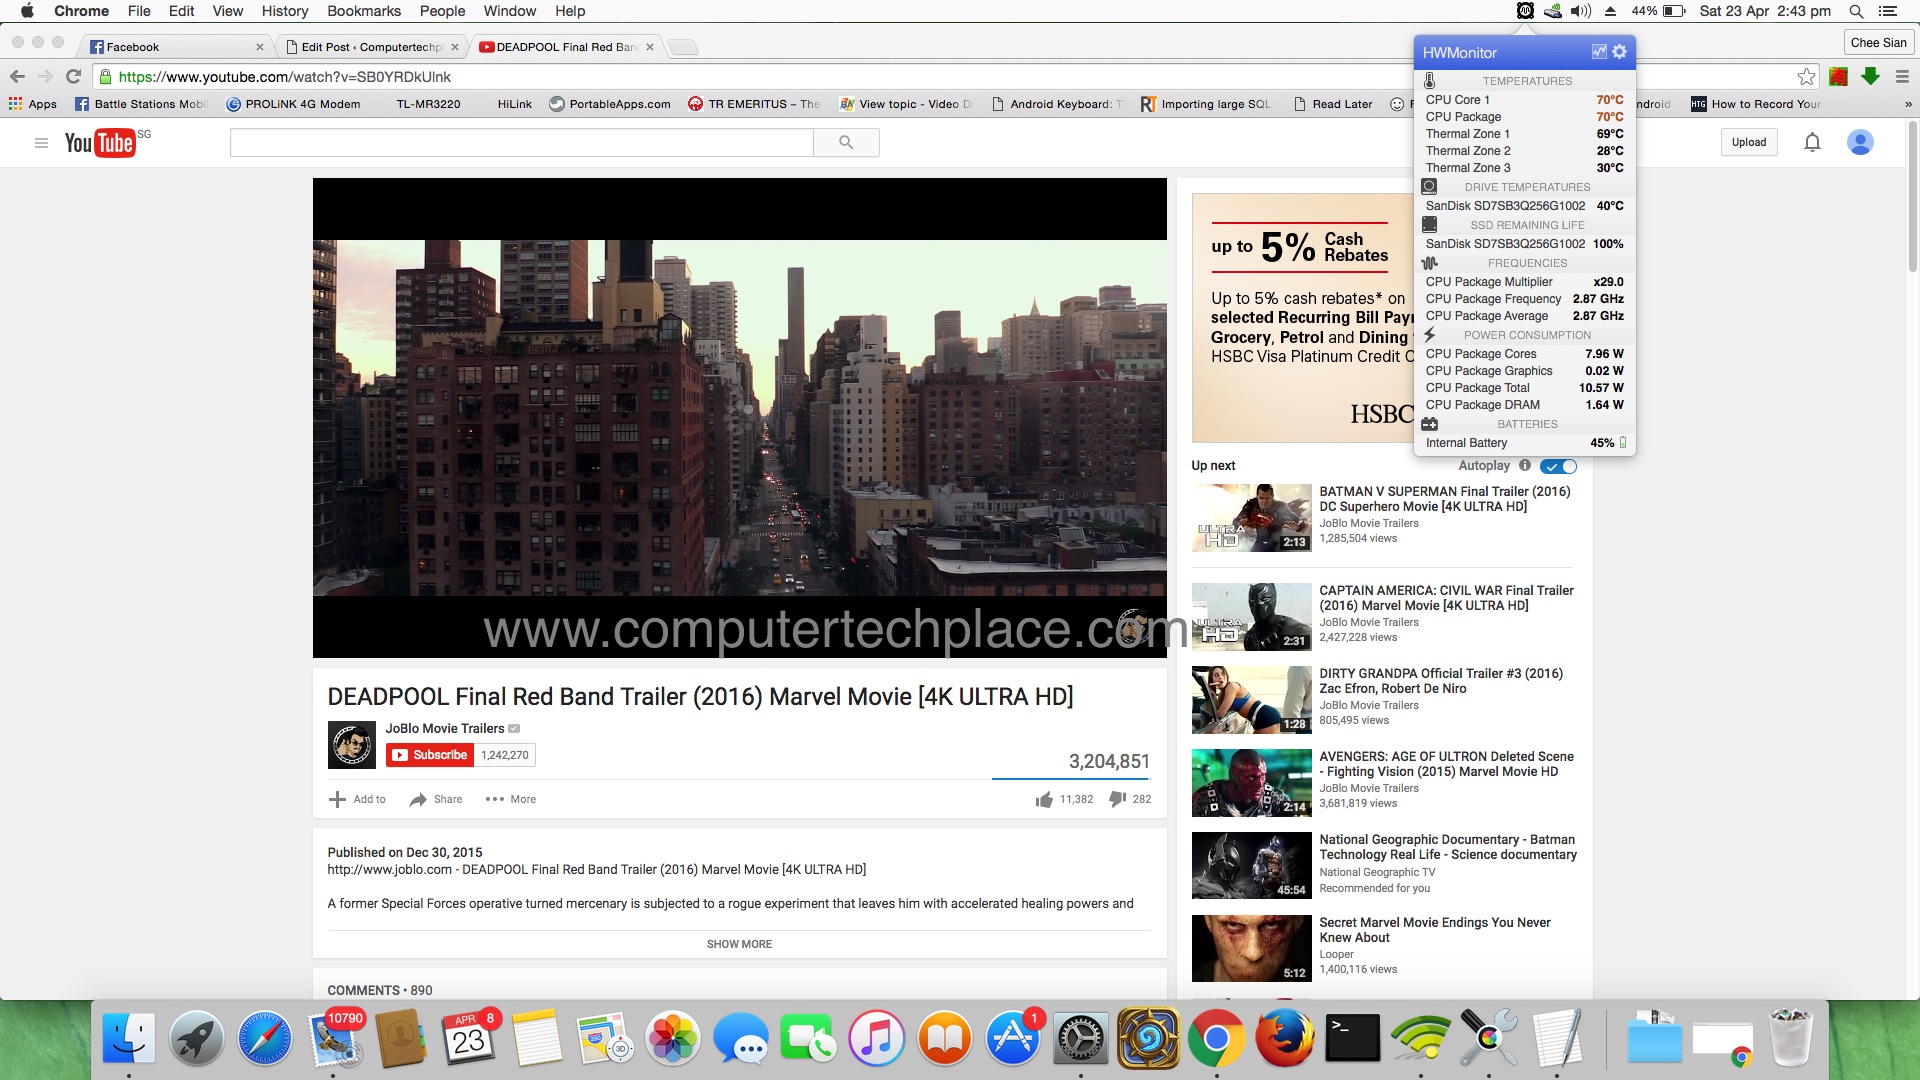
I have added a couple more extra stability tweaks in the kext guide. So far so good, this Hackintosh of mine will be able to display stats and also survive a stress test by doing a 4k video maximising and minimising repeatedly and having its CPU core reach 60 to 70 degrees and it still holds well without any glitches in the display at random intervals. It did crash once with a beach ball of death, but I think it is acceptable as long as the display does stay stable instead of blinking in a erratic manner that feels like some form of a glitch.
For pro “Hackintoshers” who do not need to read the lengthly content, – set the boot flags to include cpus=1 and IGP ID to 16160000 and also enable “Reduce Transparency” in accessibility options. I know the 16160002 gives 1536 megs of rams to the IGP but I noticed that it will cause the USB ports to lose power if I unplug the charger. It is obvious, as my wireless adapter reconnects. But now it does not any more. Well, I do acknowledge the fact that 1536 megs of IGP does feel more fluid, but it gets into random crashes more often.
I have finalised the build. Simply use the main config list that is included in this guide and the FakeSMC 6.08 in my kexts guide. After which to get a Super Duper stable Yosemite in this Laptop, simply boot up and let the laptop go to sleep by choosing sleep instead of shutdown. Wait for it to sleep. Then wake it up using your spacebar. It will not hang anymore. It runs cooler too. Signing off now.. Taking a break before attacking the El-Captain build.
Please help to contribute by testing the various kexts and update in the comments below if you find any kexts that work for this laptop. I will be updating this guide with more information as I find out more.
Attached Files
Leave a comment