Install XP via USB
 Install XP via a USB drive is a very useful concept these days when we have netbooks that come without disc drives. Using a thumb drive as the installation disc has a lot of advantages. There is no need to fear having to deal with missing files in mid way installation due to dirty or scratched discs. The overall installation timing will be faster since data transfer rate is not determined by how fast the drive is. Most newer computers these days also have a lot of problem trying to boot up from self created bootable XP discs due to some unknown reason.
That is why I looked into the concept of using USB as the Windows XP installation disc approach. The guide is lengthy and will require a lot of work to create the Windows XP bootable disc. You will need to prepare your USB thumb drive first.
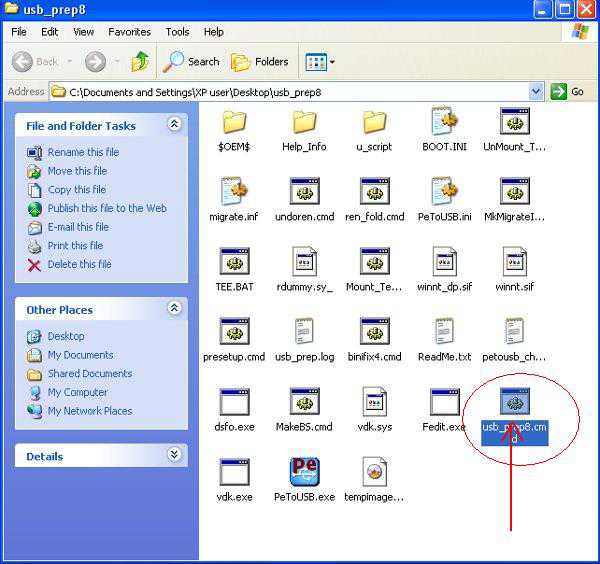
Download this USBprep file and extract it to a new folder.
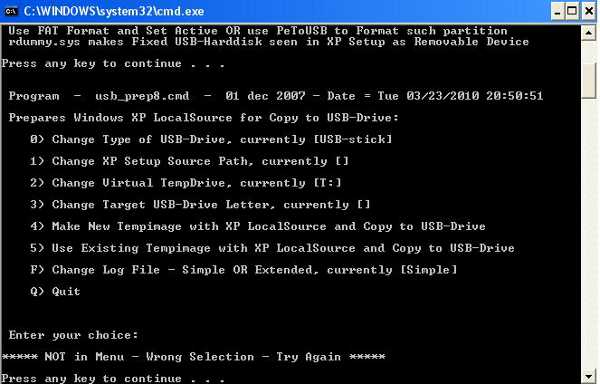
Double click on the usb_prep8.cmd and you will see a dos prompt full of text telling you what to look out for and what is required. Hit enter to continue and the PeToUSB program will run. You should have hooked up your USB thumb drive so that it gets detected automatically by this formatting program. Format the drive and you can close only this PeToUSB program. Let the Dos prompt stay opened in the background.
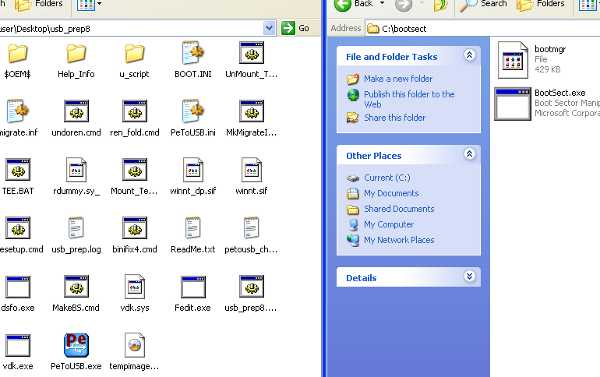
Download this Bootsect file
and extract the contents and have them placed in a folder on it’s on. Name it “Bootsect” for example and paste it in the C:\ This is to facilitate ease of using the Dos commands later.
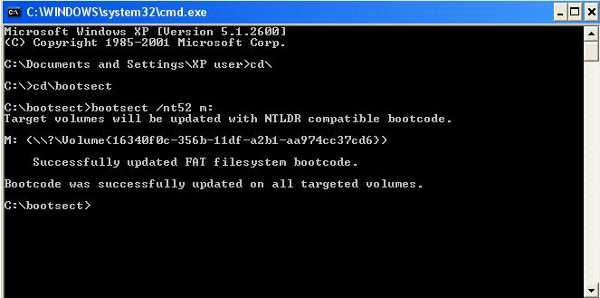
Start another Dos prompt and you will need to transfer the “boot record” over to the thumb drive. Assuming you have the “Bootsect” folder in the C:\ Key in these commands
cd\ [enter]
cd\bootsect [enter]
bootsect /nt52 m: [hit enter] m: is the drive which your thumb drive is allocated. You will know what is the allocated letter when you are performing the formatting of the thumb drive.
You can close this Dos prompt after issuing of the commands.
Now you will need to work on the previous command prompt that is being left open. You will need to set a few options. Press 1 to point the path to the Windows XP disc
Press 2 to set the Virtual Temp drive. But it is not necessary to change the default selection.
Press 3 and you will need to select your flash drive
Press 4 and you will need to say “yes” to format before the program proceeds with a series of preparation work. The program will ask you for permission before it copies the files over. This is to ensure that you have the thumb drive plugged in.
The actual copying process will take approximately 15 minutes. Choose “Yes” to both questions, if you want the USB stick to be the Preferred Boot Drive, and ” if you want to “unmount the virtual drive”.
Your bootable XP thumb drive is now finally ready, you can now use it in replacement to your Windows XP disc. But there are a few pointers to note when you are trying to perform the installation. You will need to make sure that the main hard disk is allocated the C: , or else the installation will not go through.
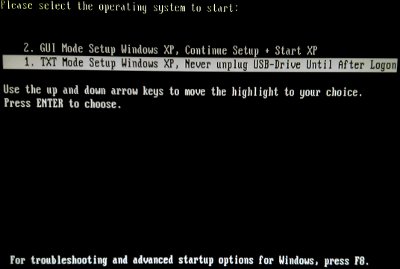
If you are installing to a fresh hard disk for the first time, there will be no partition assigned to the drive. Therefore, the thumb drive will get the C: instead. Choose the option 1. Text mode first. You will need to proceed with the installation of XP first until you get the drive formatted the first time.
Hit the reset button and do a quick reboot before it even starts copying any files. Go through the installation again and you should get the main drive assigned the C: . If it does not get assigned the C:, you will need to reset again and again until the main hard drive gets the C:.
If need be, remove any USB drives and any other devices that can be assigned a drive letter. This is to prevent any possibilities of those drives getting assigned the C: first.
Windows will boot up and starts copying of files to begin the Windows installation. After the first reboot, you will need to choose option 2. GUI mode instead to continue with the installation. You will choose the same option 2 for subsequent reboots until it enters Windows for the first time.
After which, you will enter bios setup and change the Boot priority to the hard disk and check if you can enter Windows without using the thumb drive as the boot up device. Once you are sure that the system functions well and proper. Congratulations, the installation of XP via a USB drive is successful.


Leave a comment