Install Android Froyo HTC HD 2

 There is a way to install Android 2.2 Froyo onto HTC HD 2. Even though this method is not endorsed by HTC and it will void the warranty. Nevertheless, the end state of installing Android 2.2 Froyo onto HD 2 is very impressive with most of the functions and features working fine. In this article, I will show you how to install Android onto a HTC HD 2.
The whole process is long and lengthy and can be quite scary to a non techie person, but I will list the steps down neatly so that it is simple and easy to understand. Do be careful to read the steps carefully to avoid making any mistakes to prevent damaging your phone in the process. Files attached at the bottom of the article
Step 1
Preparation and backup
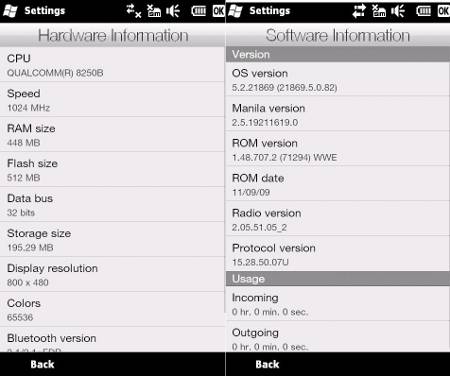
You will need to take down all necessary information such as make and model and firmware. This is so that you can have some information to refer back in case you want to restore back to factory defaults. There are stock ROMs out there for you to flash to your device. At least you know what you need to download that is the closest match to what you have. You can use a screen shot app to take a image of your whole screen and keep that image somewhere safe. For instance, online storage.
Turn off your phone. Hold the volume down button and power up the button. You should see the a tri-colored image within 3 seconds. Read the SPL number, you must have one of the following SPLs listed before you can proceed with the flash.
- SPL 1.42.0000
- SPL 1.62.0000
- SPL 1.66.0000
- SPL 2.07.0000
- SPL 2.08.0000
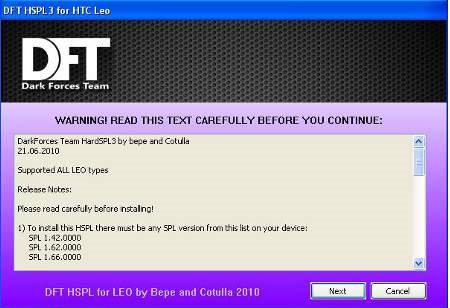
Download HSPL2 to patch your phone. You can also try HSPL3 if HSPL 2 do not get through. You will need to allow your phone to be connected to the PC via ActiveSync before you can install the flash program. You will need to install the HSPL because the “Hacked SPL” will allow you to install custom patched Windows mobile roms. You will need to install a modified Windows Rom over your original or else Android will not load.
You should see the “We Hacked it” message on the device itself.
Step 2
Install a custom ROM
Install the modified Windows Mobile rom. There are a lot of custom roms out there. Here are some of the recommended versions that are known to work with Android.
http://forum.xda-developers.com/showthread.php?t=661266
http://hotfile.com/list/701370/0d49ddf
http://forum.xda-developers.com/showthread.php?t=651729
http://forum.xda-developers.com/showthread.php?t=618787
http://forum.xda-developers.com/showthread.php?t=591784
After downloading the rom of your choice, simply extract it to a new folder and there should be 2 files. A .nbh file and a SoftwareUpgrade.exe file. Make sure that your phone has more then 50% battery and is connected to your PC via ActiveSync before you double click on the SoftwareUpgrade.exe file. The flash process will take a while to complete. Once it is done, you should see a new Windows Mobile operating system with the theme of your choice.
Step 3
Upgrade the radio
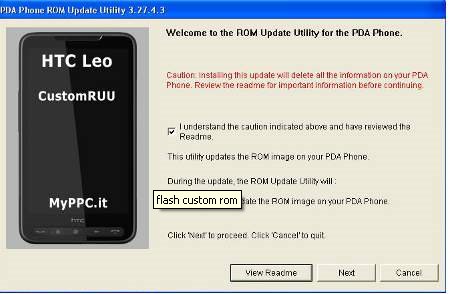
This procedure is absolutely necessary. A radio firmware will determine how the smartphone is going to communicate with the network. Radio firmwares are constantly upgrading to newer versions to complement newer gadgets and device. Thus the newer Android Froyo requires a newer radio. I am using the Leo_RADIO_2.12.50.02_2.
Extract the files to a new folder or put them simply on the Desktop. Double click on the CustomRUU.exe to upgrade your radio firmware.
Step 4
Formatting SD card for Android Froyo
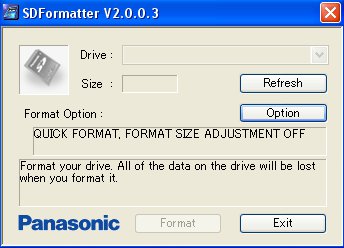
This step may not be a requirement. You will only need to do so if you are unable to boot up your Android after copying the Android over to the SD card. Download the Panasonic SD card formatting tool. This tool will allow you to format your SD card correctly without errors. Take out your SD card and insert it into any card reader so that it can be read off your computer. That program should detect your SD card.
Step 5
Download your Android
There are quite a lot of Android versions out there. Google search for Android Froyo and you should get some download results from the online storage sites. I recommend one stable version here. MCCM SE 1.5 , MCCM 1.7.1
Extract the file first and copy the whole Android folder to the SD card as a whole. You can copy the Android folder across using the card reader from your PC or simply connect your Windows Mobile Phone to your PC via ActiveSync. Then copy the Android folder across as if you are moving files to the storage card. Once you have copied the Android folder and its contents over, you can start the Android Froyo by navigating via the device directly to the Android files. You will need to click on the CLRCAD.exe first, nothing will happen, followed by the haret.exe. Android will start booting. You will see some text, followed by a black screen with a green HTC logo. The first boot will take very long. It is so long that you might as well let it be for a few hours.
Step 6
Install the dual boot app
Android is loaded from the SD card and not hard flashed onto the onboard memory itself. Thus the device will be resetted back to the Windows Mobile everytime you turn off the device. So you can install the dual boot loader program.
This is a Windows Mobile program in the form of a cab file. Transfer this file to the phone and install it inside the Windows Mobile. Now you will get a menu to boot between Android or Windows everytime you turn on your phone. Now you are done with the installation of Android Froyo on a HTC HD 2. I hope this guide is easy to follow.


Leave a comment