Install Mac OS X Mountain Lion Developer Preview Into Desktop PC
Mac OS X Mountain Lion is the latest Mac OS version. Currently the developer preview is avaliable for download via torrent websites. For those people who use Windows but want to dip their feet in the new Mac OS X Mountain Lion developer preview , this guide will show you how to install the Mountain Lion developer preview into the Desktop PC. Thankfully, the latest update of the myHack 3.0 has made everything a whole lot easier.
Step 1
Preparation
Things you will need
1. Mac OS X Snow Leopard DVD or image.
2. Mac OS X Mountain Lion developer preview DMG (Download from bittorrent sites)
3. MyHack app 3.0
4. Mountain Lion kexts
5. tonymac iboot iso (required if you haven’t installed Snow Leopard )
6. Multi-beast ( Only required for installation of Snow Leopard)
7. 8 Gig USB thumb drive
Step 2
Install Snow Leopard
Unfortunately the Mac OS Mountain Lion developer preview DMG cannot be mounted or read correctly via a Windows system. Unless you are able to land your hands on a iso version that is converted from DMG and it really works, you will need to make use of Snow Leopard as the jump start platform.
Follow the guide on how to install Mac OS X Snow Leopard on a PC to get a functioning Snow Leopard first. You will need to make use of the Multi-beast to change the bootloader to the Chimera loader. Some users may be using the Chameleon boot loader, the Chameleon is unable to support the installation of Mac OS X Mountain Lion.
Step 3
Prepare the Mountain Lion installer
Even though the Mountain Lion operating system exists in the form of a DMG, you cannot mount the disc and install direct. You will need to prepare the Mountain Lion installer. You will need to use a USB thumb drive. Use the “Disk Utility” software in “Applications” to format the USB partition as Mac OS X Journaled type.
Prepare the Extra folder
Use the Finder program and search for the “Extras” folder. Duplicate the Extras folder, you can find the Extras folder right in the root of your drive. Download the Mountain Lion kexts and extract the contents. Make a new folder called “Extensions” in the Extras folder if it does not exist. Copy and paste the 2 Mountain Lion kexts files into the Extensions folder. If there is a prompt asking you if you want to replace the files in there, select “Yes. ” and replace any existing older versions of the files.
Run the myHack app.
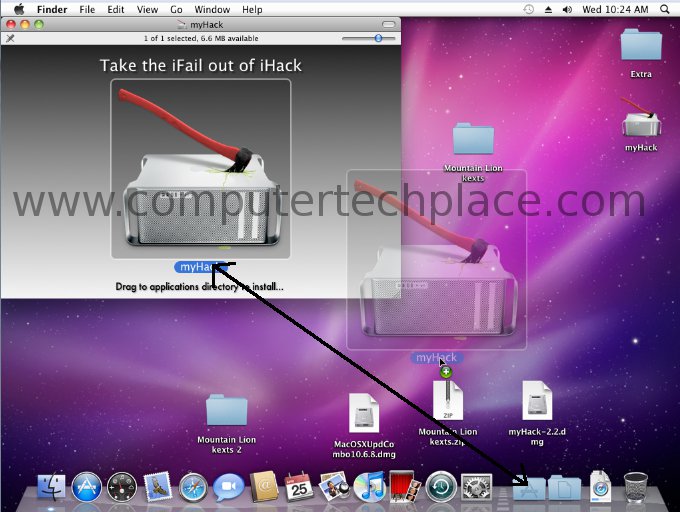
After preparing the Extras folder, click on the myHack app in applications and it will start up, you are required to click and hold on to the myHack text right below the myHack image. Drag and drop into the “Applications”
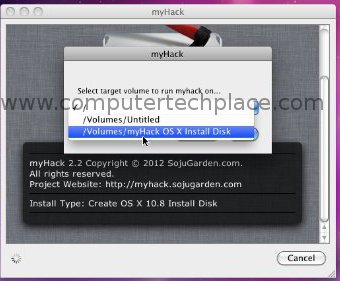
After that you will be able to run myHack from the “Applications”. You will be asked to key in the password. Choose create OSX installer, after that choose Select create OS X 10.8 Install Disk. If you have connected your USB thumb drive and it has been formatted using Disk Utility. You must format the thumb drive in Disk Utility beforehand or else you will not be able to choose the thumb drive as the installation path. The thumb drive will not show if it is not formatted to Mac OS X Journaled in Disk Utility.
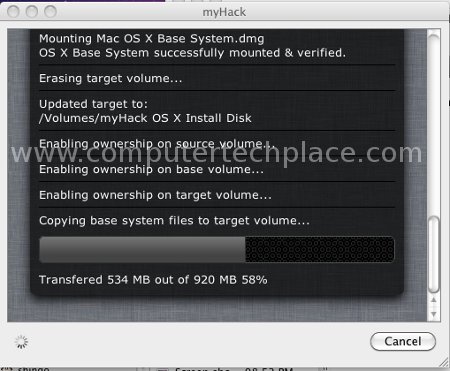
The next step is to get you to select the installation source which you must point to the Mountain Lion DMG. The myHack app will issue a warning that all data on the thumb drive or partition will be erased. It will proceed to copy all nessassary files to your thumb drive. Half way through the installation, it will ask you if you wish to use the generic “Extras” folder or use your own, select use your own, and point to the “Extras” folder that you have created. The whole creating of the thumb drive takes a shit hell of a long time.
In fact, I used a USB 2.0 thumb drive and it takes almost 1 and a half hours. The myHack app even hangs at refreshing cache. But after waiting for too long, and I noticed that there is no more lights blinking on my thumb drive, I shut down the computer instead of cancelling the application. And the thumb drive still works fine and dandy.
Once everything is completed, you can exit the app. Reboot your Mac OS and make sure that you have selected the boot device to be the thumb drive that you have just created. Now all you need to do is wait. Have lots of paitence and it takes around 15 minutes just to load up.
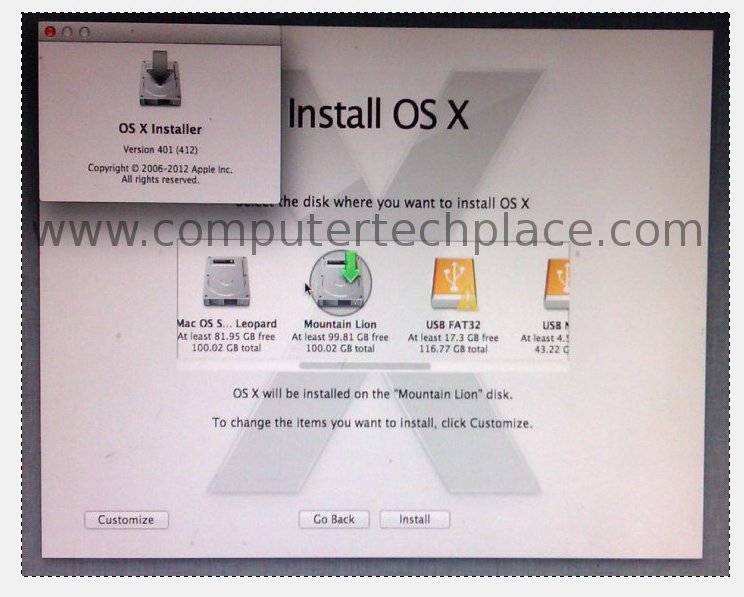
The installer should go through and you will get to the ever familiar screen whenever you need to install a Mac OS.
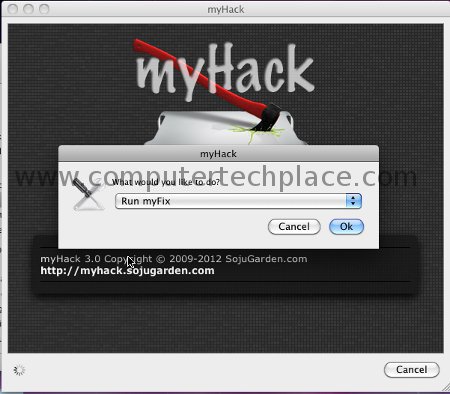
After the installation of Mountain Lion is completed, you have one more step to go. You will realize that you are still unable to start up Mountain Lion from the Chimera boot loader. Boot into Snow Leopard again, run the myHack app again. This time round, select Run myfix. Point the destination to the partition where the Mountain Lion is installed to.
Give it some time, say 15 minutes. Or until there is no more hard disk activity. My experience is that it simply does not end, and you will need to cancel the job. But after rebooting, simply hit any key while the Chimera bootloader is loading and it will pause the screen so that you can choose the other partition where you have installed the Mountain Lion OS. Mountain Lion OS will load successfully now.


Leave a comment